
As the fall chill creeps in and daylight hours shrink, one thing is guaranteed: bucks are about to get serious. During October and into November, scrape lines become one of the most reliable indicators of deer movement and rut activity. For hunters looking to capitalize on that behavior, a well-placed trail camera can offer the kind of intel that leads to tagged-out success.
Whether you’re targeting daylight movement, identifying your hit list buck, or simply monitoring rut progression, this guide will walk you through exactly how to set up trail cameras for scrape line monitoring this fall—plus the best gear to get the job done right.
What Are Scrape Lines—and Why Should You Monitor Them?
A scrape line is a series of ground scrapes made by bucks to communicate dominance, check for receptive does, and mark territory. These scrapes are often located:
- Along field edges
- Near primary trails
- On logging roads or old fire lanes
- Around doe bedding areas
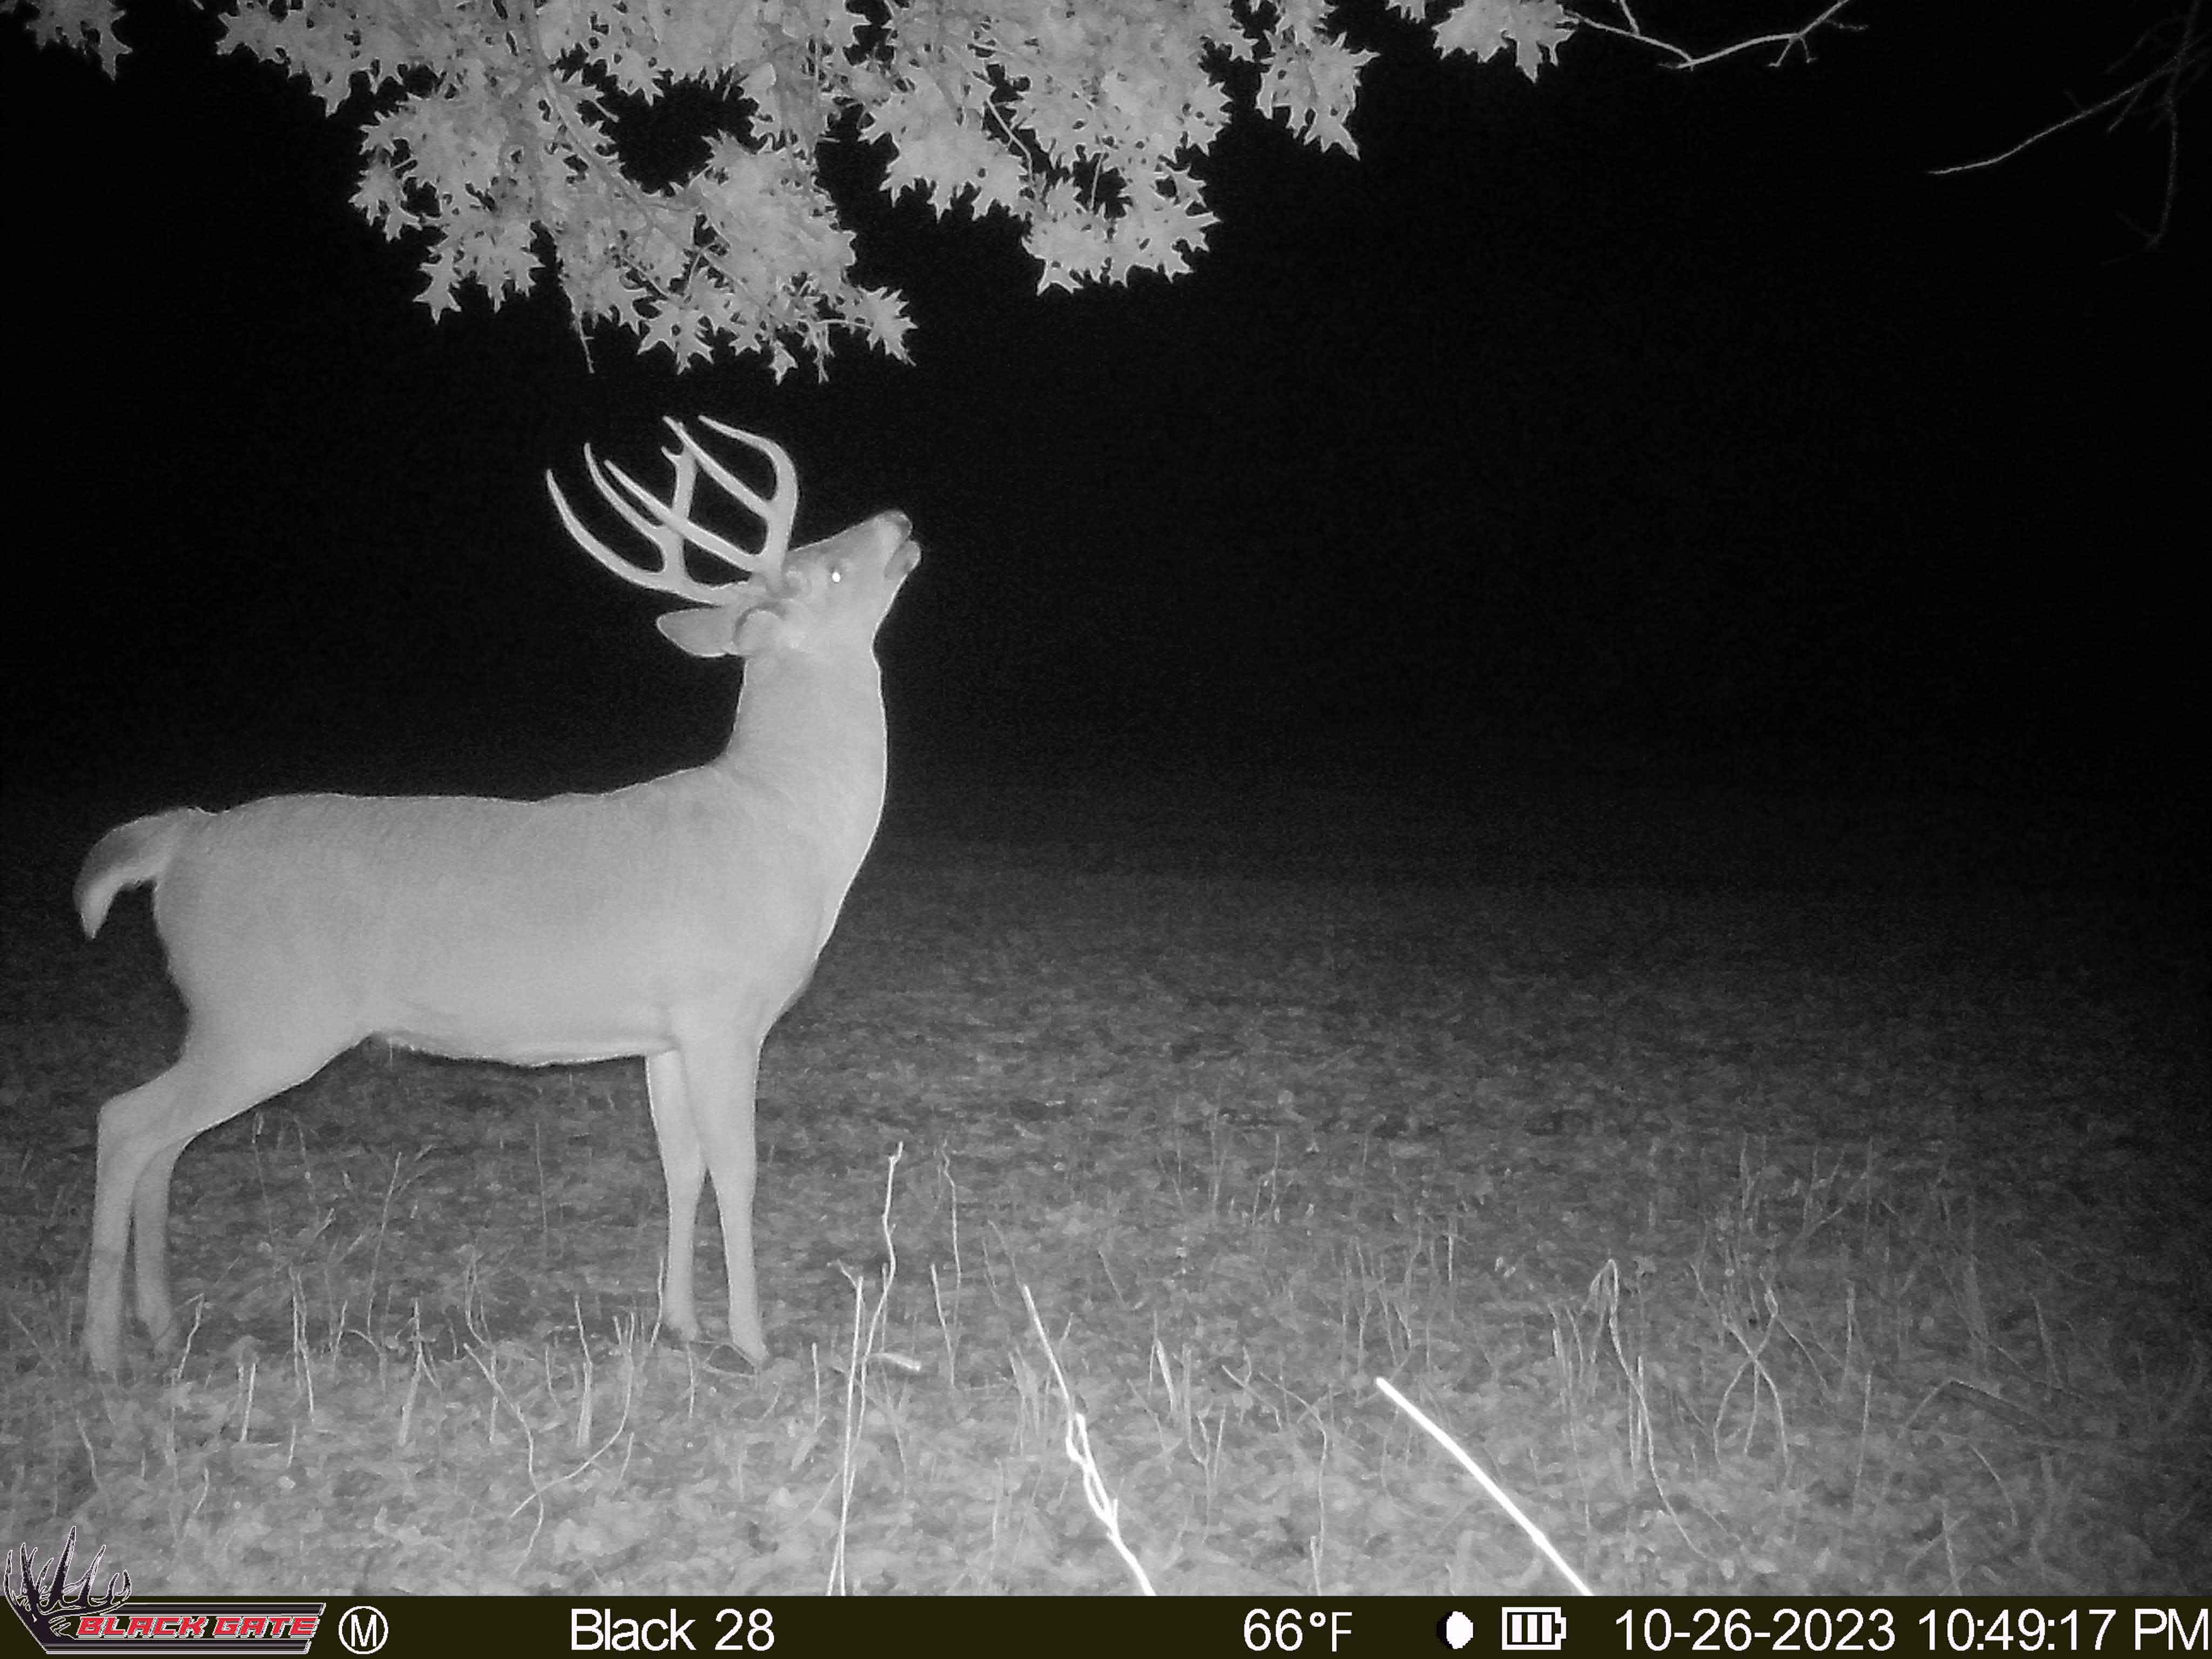
Bucks will freshen scrapes repeatedly during the pre-rut and rut phases, especially between mid-October and early November. Monitoring these with a trail camera lets you capture high-frequency visits—often during daylight hours—making them a top location for fall scouting.
Step-by-Step: Setting Up a Trail Camera on a Scrape Line
✅ Step 1: Identify the Right Scrape
Look for:
- Licking branches overhead (a key communication point)
- Disturbed, bare earth under the branch
- Nearby tracks or fresh droppings
- Multiple scrapes in a line, usually 20–50 yards apart
Choose a scrape with recent activity and clear access for deer movement. Prioritize those along known travel routes, between bedding and food.
✅ Step 2: Choose the Best Camera Angle and Height
Improper angle or placement is one of the biggest mistakes in scrape line trail camera setup.
Best practices:
- Mount the camera about 3-4 feet high
- Place it 10–15 feet away from the scrape
- Angle it perpendicular to the scrape, or at a 45-degree angle to catch movement coming and going
This setup captures the buck’s body, antlers, and behavior at the scrape—whether he's licking the branch, pawing the ground, or making a rub nearby.
✅ Step 3: Minimize Intrusion and Human Scent
Mature bucks won’t tolerate pressure in their core area, especially near scrapes. Treat every camera setup like a hunt.
Low-impact tips:
- Wear rubber boots and scent-free gloves
- Avoid brushing against vegetation
- Set your camera mid-day when deer movement is lowest
- Get in and out quickly
Better yet—go cellular. The R4G GEN2 sends real-time photos and videos directly to your phone, so you don’t need to revisit the camera until the season ends.
✅ Step 4: Use Video Mode to Capture Behavior
Scrapes are dynamic. Bucks may work them, posture, spar, or scent-check. Capturing these moments is easier with short videos rather than still images.
Recommended settings:
- Video mode: 10 seconds with Black Gate
- Trigger interval: 30 seconds to 1 minute
- Sensitivity: Automatic sensitivity while using Black Gate
The R4G GEN2 offers HD video and customizable trigger speeds for the perfect balance of detail and efficiency.
✅ Step 5: Track Timing and Build a Movement Profile
Once your scrape cam is live, start logging:
- Time of day deer visit
- Buck age class and antler traits
- Direction of travel
- Moon phase, temperature, and weather conditions
This data helps you identify daylight vs. nighttime activity and predict which days are best to make a move.
Hot tip: If a buck starts showing up in the same 30-minute window over several days—get in the stand. He’s on a pattern.
Bonus: Set Up a Mock Scrape to Create Your Own Intel Hub
Can’t find an active scrape line near your stand? Make your own.
How to make a mock scrape:
- Clear a patch of earth 2–3 feet wide under an overhanging branch.
- Break the branch tip to create a fresh licking branch 3–4 feet off the ground.
- Add buck or doe urine as a scent trigger.
- Mount your trail camera exactly as you would on a natural scrape.
Mock scrapes can pull bucks into daylight and keep them in your area longer, especially pre-rut. Monitor activity and refresh scent only as needed to reduce intrusion.
Why Black Gate Trail Cameras Work So Well for Scrape Monitoring
Monitoring scrapes is all about speed, clarity, and reliability—and that’s what the R4G line delivers.
- Real-time photo and video delivery
- Fast trigger and recovery speeds
- Stealthy no-glow IR for nighttime behavior
- Crisp HD images. Photo Only device.
- Simple setup for multiple locations
- Ideal for hunters managing scrape lines across multiple zones
- No Glow IR for nighttime images
Both models are built for the field, weatherproof, and easy to deploy—even deep in the woods where scrape lines often form.
Final Thoughts
Scrapes are the rut’s bulletin boards—and your trail camera is the reading glass. When you set up your cameras right, you don’t just collect pictures—you collect patterns, behavior cues, and opportunities.
This fall, make your trail cams work harder. Monitor natural scrapes, build mock setups, and track activity to identify the exact windows where a mature buck feels comfortable moving. With the right intel—and the right gear from Black Gate Hunting—you’ll be one step ahead all season.
🎯 Ready to scout smarter? Shop Black Gate Trail Cameras
Share:
Trail Camera Setup for Food Plot Hunting: Best Angles, Timing, and Locations
Best Cellular Trail Cameras for Hunting Season 2025: What to Know Before You Buy